The Angular CLI is the recommended approach for starting new Angular applications, because it gives you an awesome app out of the box. But let's imagine you've run ng new already. What should you do next? How can you help ensure you build an awesome app that scales?
For the purposes of this article, I'm going to assume you already chose to use SCSS and the router when prompted, because both of those are very good ideas.
1. Setup naive continuous integration with CircleCI
I call this a naive configuration, because it's not truly "continuous integration" until you have a much more robust system, but it's been a great starting point for applications I've worked on. I used to use TravisCI but it looks like the world is moving towards CircleCI.
Create a file called .circleci/config.yml
If you know how to configure CircleCI, great! Go ahead and do that. If you don't? Just use my most basic config here:
version: 2
jobs:
  build:
    working_directory: ~/my-project
    docker:
      - image: circleci/node:12-browsers
    steps:
      - checkout
      - restore_cache:
          name: Restore Yarn Package Cache
          keys:
            - yarn-packages-{{ checksum "yarn.lock" }}
      - run:
          name: Install Dependencies
          command: yarn install --frozen-lockfile
      - save_cache:
          name: Save Yarn Package Cache
          key: yarn-packages-{{ checksum "yarn.lock" }}
          paths:
            - ~/.cache/yarn
      - run: xvfb-run -a npm run lint
      - run: xvfb-run -a npm run build --prod --progress=false
This config will automatically lint your project, and run a production build. It assumes you want Node 12, and to use yarn.
Why not run tests? You should probably run your tests too! I don't include them here because I have found that at least on day 1 of a new project, maintaining tests can often be a distraction from figuring out how your application should be architected, but every app should ALWAYS pass lint checks, and be buildable.
2. Add a design system
The easiest way to start making your app look better is to add a design system like Material Design. The Angular team provides a set of components that embody Material Design in the library Angular Material. You can add it into your app via the CLI, and then create a navigation component for your app.
ng add @angular/material
ng generate @angular/material:nav app-nav
This will create an app-nav component with many of the features you'll need to start your app in the right direction, from a responsive sidenav to a top toolbar.
3. Add offline support and PWA superpowers
Offline support is a really desirable feature in web applications that can make your app much more capable than traditional web apps. Angular's Progressive Web App (PWA) support makes this much easier.
ng add @angular/pwa
Running this command will create a web app manifest (manifest.webmanifest) which you should customize along with your favicon.ico and icons files. It also creates an ngsw-config.json which configures how your application should behave offline. Which files should be cached, when should they be cached (lazy vs prefetch)? Should you prefer the latest content (freshness) or the fastest content (performance) for a strategy.
Read all about the various options for the service worker config.
4. Add Firebase Authentication
Almost every application I've ever built needed to know something about my users, and to offer customizations and data for them over time. Often this leads us to build custom auth systems, or manually integrate with Google, Facebook, etc. Firebase gives us a better way. A single integration with Firebase's auth system means we can get access to all of the social logins we need, and we never have to manage passwords, and eliminates much of the worry over the security of our users.
ng add @angular/fire
You'll want to create a Firebase project on the console and add a Web App. It will give you a screen with a configuration that will look like this:
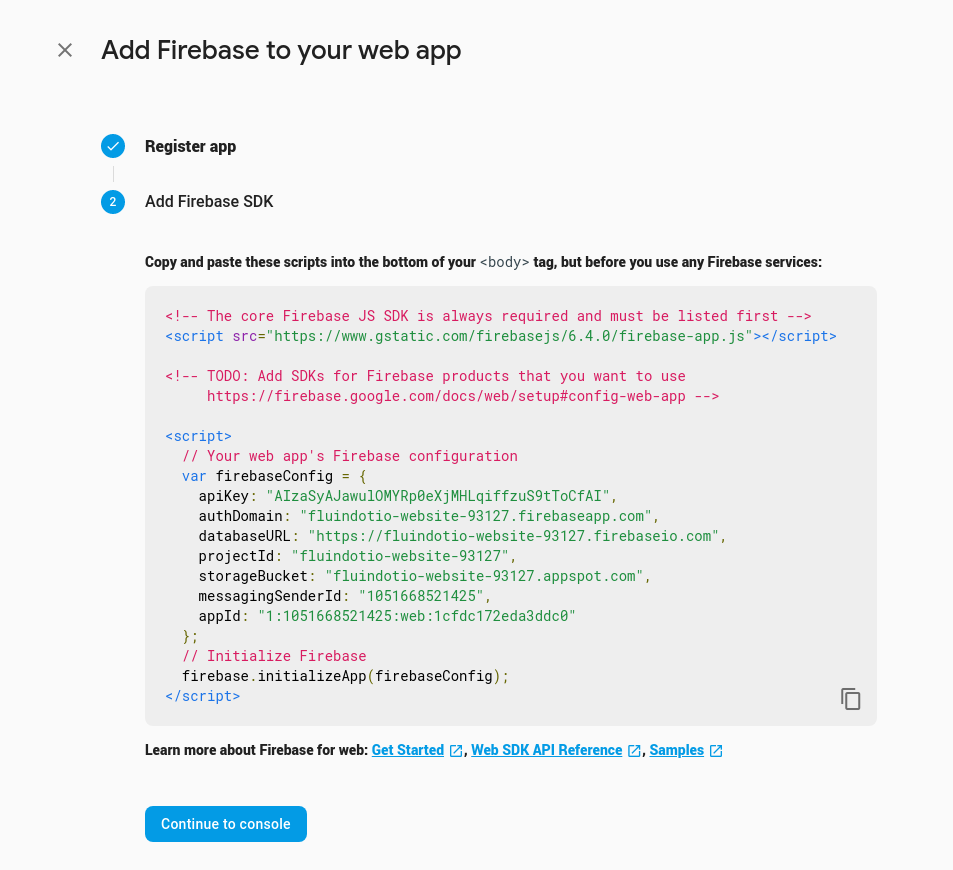
Ignore the instructions and copy the JSON configuration object. You'll place this in your app module as follows:
imports: [
...
AngularFireModule.forRoot({.. THE COPIED OBJECT...}),
...
]
From there I typically create some sort of auth.service.ts that wraps the Firebase authentication methods and provides helpful Observables I use throughout my app like "is the user currently logged in?"
this.isUser = auth.authState.pipe(map(authState => (authState ? authState.uid : null)));
5. Add a server & backend
This one is newer, but very cool. When you get big enough, you might start reaching for more traditional database tools like Mongo/MySQL/PostgreSQL, and when you want to take full control of your backend, it's possible to do so in the same Angular project via a cool framework called NestJS.
ng add @nestjs/ng-universal
This one command will update your Angular application with a server folder where you can nest generate new APIs or backend tools, and also adds in built-in server side rendering, which can improve the feeling of speed in your application.